
Small Kitchen Repairs Every Homeowner Faces
Key takeaways
- Most everyday kitchen problems, from loose cabinet doors to dripping taps, are quick fixes you can handle with a basic toolkit in under an hour.
- A single tap dripping once per second wastes more than 3,000 gallons a year, so a 20-minute washer swap pays for itself fast.
- Resealing worktops and the sink edge before water gets behind them prevents swollen chipboard and costly cabinet replacement.
- European cabinet hinges have built-in screws that let you correct crooked doors in minutes without removing anything.
- Zurich's medium-hard water clogs tap aerators with limescale, so cleaning or replacing them restores pressure and is one of the cheapest fixes going.
Most of the kitchen problems that nag at you day to day, a door that swings open on its own, a tap that drips, a drawer that sticks, come down to a handful of simple repairs you can make yourself in under an hour. The kitchen repairs home life throws at you are rarely emergencies. They are the slow, creeping annoyances that get worse when ignored, and almost all of them need nothing more than a screwdriver, a little patience, and knowing which screw to turn.
This guide walks through the repairs that come up again and again in Zurich kitchens, from loose hinges to worn tap washers. For each one you will find how to spot the problem early, how to fix it, and the point at which it stops being a quick job and becomes something worth handing to a professional. The goal is to keep your kitchen working well for years without reaching for the renovation budget.
Why the Kitchen Repairs Home Life Throws at You Matter
The kitchen takes more punishment than any other room in the house. Doors get opened and closed dozens of times a day, water splashes everywhere, heat and steam rise off the hob, and heavy pans swing in and out of cupboards. That constant wear is exactly why small faults appear here first.
It is also why they are worth catching early. The kitchen is the room people invest in most: the Houzz 2026 kitchen trends study found that 26 percent of renovating homeowners upgraded their kitchen, making it the single most popular room to renovate. A kitchen that has been looked after with small, regular repairs reaches that renovation point far later, and often needs far less work when it does.
The repairs below share a pattern. Each starts as a minor irritation, each gets worse if left, and each is cheap and fast to fix at the right moment. Knowing the difference between a 15-minute job and a swollen worktop that needs replacing is the whole point.
Fixing Loose Cabinet Doors
A cabinet door that has gone loose is the most common complaint in any kitchen. You open it, and instead of swinging cleanly it wobbles, catches on the frame, or sags at one corner. Nine times out of ten the cause is simple: the screws holding the hinge to the door or the cabinet have worked themselves loose from years of opening and closing.
Start by opening the door fully and looking at the two hinges. Each hinge has a set of screws fixing it to the door and another set fixing the mounting plate to the inside of the cabinet. Grab a Phillips screwdriver and firmly tighten every one. In many cases that alone solves the problem.
If the screw just spins and will not bite, the hole has worn too wide. You do not need a new cabinet. Try one of these:
- Matchstick trick: push a wooden matchstick or two with a dab of wood glue into the hole, snap off the excess, let it set, and drive the screw back in. The fresh wood gives the thread something to grip.
- Larger screw: step up one screw size so the thread bites into solid material.
- Wooden dowel: for a badly worn hole, drill it out cleanly, glue in a short dowel, and re-drill a pilot hole.
If the hinge itself is bent or the door is split, that is the point to stop. A damaged door usually needs a matching replacement, which is worth getting a professional to source so the colour and finish line up with the rest of the run.
Repairing Sticking and Sagging Drawer Runners
Drawers that stick, scrape, or refuse to close flush are usually a runner problem. Modern kitchens mostly use metal side runners or under-mount soft-close runners, and both wear in predictable ways.
First, empty the drawer and pull it right out. Most runners release when the drawer is fully extended and you lift the front slightly or press a small plastic lever on each side. With the drawer out, look at the runners on the cabinet. You are checking for three things: dirt and crumbs jamming the mechanism, bent rails, and loose mounting screws.
A surprising number of sticking drawers come right with nothing more than a clean. Wipe the runners, clear any debris from the ball-bearing track, and add a small amount of white lithium grease or a silicone spray. Avoid oily lubricants, which attract dust and gum up over time.
If the drawer sags or sits crooked, the mounting screws have usually slipped. Tighten them, and if the holes have worn, use the same matchstick trick from the cabinet doors. For soft-close runners that have stopped closing gently, check for a small adjustment wheel underneath the runner near the front: turning it changes the closing tension. If the runner is physically bent or the soft-close damper has failed, replacement runners are inexpensive and sold in standard lengths, though matching the exact mounting pattern is where a handyman saves you a wasted trip to the shop.
Resealing Worktops and the Area Around the Sink
Water is the enemy of a kitchen worktop, and the weakest point is always the join between the worktop and the sink, and the seam where the worktop meets the wall. Most Swiss kitchens use laminate or chipboard-core worktops that swell permanently once water gets into the core. By the time you see a bubble or a dark edge near the sink, the damage is often already done.
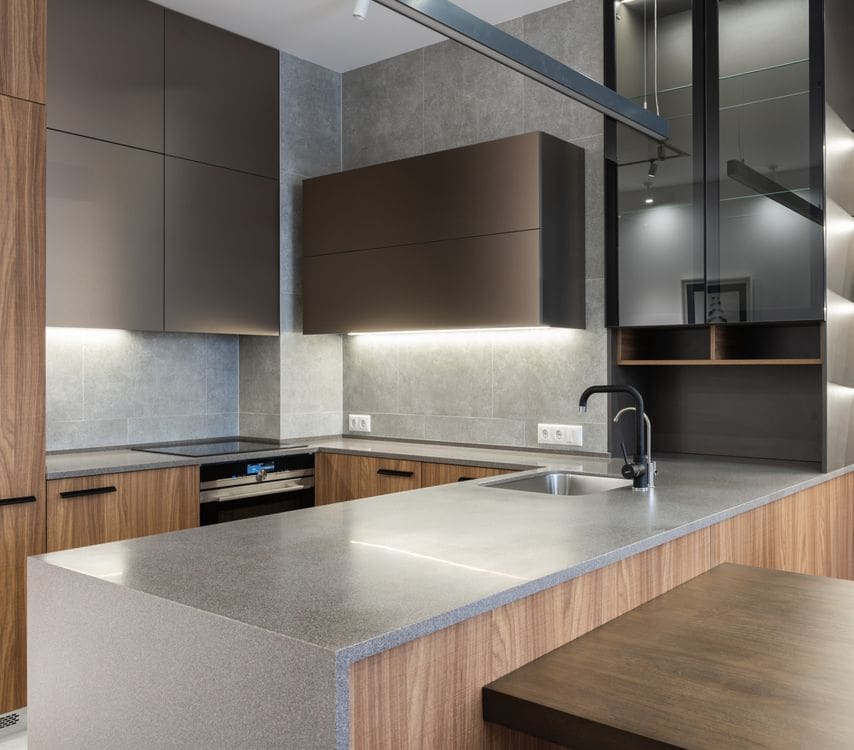
That is why resealing is the single highest-value repair in this list. It is cheap, it takes under an hour, and it prevents a failure that can cost hundreds to put right. Inspect your seals once a year. If the silicone has gone brittle, discoloured, cracked, or started to peel away from the surface, it is time to redo it.
The method is the same one used for bathrooms, and the technique transfers directly from our guide on how to reseal a bathroom with fresh silicone:
- Strip the old silicone. Slice along both edges with a sharp blade and peel it out. Remove every last trace, as new silicone will not bond to old.
- Clean and dry. Wipe the gap with a kitchen cleaner, then a little rubbing alcohol, and let it dry completely. Any moisture trapped underneath will cause mould.
- Mask the edges. Run masking tape along both sides of the gap for a crisp line.
- Choose the right sealant. Use a kitchen-grade mould-resistant silicone, not a general-purpose one.
- Apply and tool. Lay a steady bead, smooth it with a wetted finger or a sealant tool, and peel the tape away before it skins over.
Leave it to cure fully, usually 24 hours, before letting the area get wet. For the back seam where the worktop meets the wall, the same approach applies, and a small sealant failure there behind the tap is one of the most overlooked sources of water damage in a kitchen.
Replacing Worn Tap Washers to Stop a Drip
A dripping kitchen tap is more than an annoyance. It is one of the most wasteful faults in the home. According to the US Environmental Protection Agency, a faucet dripping at one drip per second wastes more than 3,000 gallons per year, and the agency notes that the average household's leaks account for more than 9,300 gallons wasted every year. Fixing those easily corrected leaks, it adds, can save a household around 10 percent on its water bills. A new washer costs almost nothing by comparison.
For a traditional tap with separate hot and cold handles, the drip is almost always a perished washer. Here is the sequence:
- Turn off the water. Close the isolation valve under the sink, or the main stopcock. Then open the tap to drain the pressure.
- Plug the drain so you do not lose any small parts down it.
- Remove the handle. Prise off the decorative cap, undo the screw beneath, and lift the handle off.
- Unscrew the valve body with a spanner and lift it out.
- Replace the washer at the base. Take the old one to the hardware shop to match the size exactly.
- Reassemble and test by turning the water back on slowly.
Mixer taps and single-lever taps are different. They usually drip because of a worn ceramic cartridge rather than a washer, and the cartridge is a sealed unit you swap as a whole. The principle is identical: isolate the water, open it up, replace the worn part, and reassemble. If you cannot identify the cartridge or the tap body is corroded in place, that is a sensible point to call a professional rather than risk cracking a fitting.
Cleaning and Replacing a Clogged Aerator
If your kitchen tap has lost pressure or started spraying sideways, the aerator is almost always the culprit. The aerator is the small mesh-and-screen fitting screwed into the very tip of the spout. It mixes air into the water and catches grit, and over time it clogs with debris and limescale.
Zurich's water matters here. The city's water supply is classed as soft to medium-hard, and even at that level it leaves a steady film of limescale on fittings over the months. That mineral build-up is exactly what strangles an aerator.
Cleaning one takes five minutes:
- Unscrew the aerator by hand, or wrap a cloth around it and use pliers gently to protect the finish.
- Take it apart, keeping the washers and screens in order.
- Soak the parts in white vinegar for an hour to dissolve the limescale, then scrub with an old toothbrush.
- Rinse, reassemble in the same order, and screw it back on hand-tight.
If the mesh is damaged or corroded, replace it. Aerators are cheap, come in standard thread sizes, and simply screw on. Doing this once or twice a year keeps your water pressure strong and your tap looking clean. For a wider view of how limescale and hard water affect your fittings across the home, our seasonal home maintenance schedule for Zurich folds this kind of check into a yearly routine.
Adjusting Hinges for Even Cabinet Alignment
Here is a repair that transforms how a kitchen looks in minutes. Over time, cabinet doors drift out of line: one sits higher than its neighbour, gaps open unevenly, or a door no longer closes flush. The good news is that almost every modern European kitchen uses adjustable concealed hinges designed for exactly this.
Open the door and look at the hinge. You will see two or three small screws, each controlling a different direction of movement:
- Side-to-side (lateral): the screw nearest the door face moves the door left or right. Turn it to close an uneven gap between two doors.
- Depth (in and out): the middle or rear screw pushes the door closer to the frame or further away, fixing a door that catches or sits proud.
- Height: the screws holding the mounting plate to the cabinet, when loosened slightly, let you slide the whole door up or down before you retighten them.
Work on one door at a time, make small quarter-turn adjustments, and close the door to check after each turn. The trick is patience: nudge, check, nudge again. Step back from the whole run occasionally to see that the lines are even across the kitchen, not just on the one door you are fixing. Within ten minutes a tired, crooked-looking set of cupboards can look square and intentional again, which is why this is one of the most satisfying jobs on the list.
Dealing With Chipped Worktop Edges and Laminate Lifting
Laminate worktops take knocks at the corners and along the front edge, and once the top layer chips or lifts, water and grime work their way under it. Left alone, a small lifted edge spreads and the whole section delaminates.
For a lifted edge, the fix is straightforward. Clean out any crumbs and moisture from under the lifted laminate, apply a contact adhesive rated for laminate to both surfaces, let it go tacky as the instructions direct, then press the edge down firmly and weight it until the glue sets. For a small chip, a matching worktop repair filler or a two-part epoxy tinted to the right colour fills the gap and stops it growing.
The limit here is honesty about the result. A repair on a dark or patterned worktop can be nearly invisible, but on a plain pale surface it will often show. If the chip is large, sits right at the sink, or the core is already swollen, replacing the worktop section is the better long-term choice.
Fixing Squeaks, Rattles, and Soft-Close Faults
Not every kitchen fault is structural. A lot of the daily irritation comes from noise: a cupboard door that squeaks, a drawer that rattles, a soft-close hinge that has started to slam.
Squeaks almost always come from the hinge pivot. A single drop of light machine oil or a touch of silicone spray on the moving part of the hinge silences it immediately. Wipe away the excess so it does not drip onto the door. The same principle covers squeaky hinges throughout the house.
Rattling usually means a door or drawer that no longer closes tight against its stops. For doors, the depth-adjustment screw on the hinge pulls the door in until it rests snugly. For drawers, check that the soft-close damper is still engaging. Many soft-close hinges and runners have small adjustment dials or clips that control the closing force, and a door that has started slamming can often be calmed by increasing that resistance rather than replacing the hinge.
Small self-adhesive bumper pads on the inside corners of doors are the cheapest fix of all. They cushion the close, cut the noise, and stop the paint wearing where the door meets the frame.
Quick Fixes That Extend Your Kitchen's Life
Beyond repairing faults as they appear, a few habits keep the whole kitchen working for longer and push back the day you need major work. None of these take more than a few minutes, and together they make the difference between a kitchen that ages gracefully and one that wears out early.
- Tighten everything once a year. Go round every cabinet door, drawer, and handle with a screwdriver. Loose screws caught early never become worn holes.
- Keep seals intact. Check the silicone around the sink and worktop seams annually, and reseal at the first sign of lifting rather than waiting for water damage.
- Clean aerators and check for drips. A two-minute look at every tap catches a worn washer before it wastes thousands of litres.
- Lubricate moving parts. A little silicone on runners and hinges once a year keeps everything gliding and quiet.
- Watch for water where it should not be. A damp patch inside a sink cabinet, a swelling worktop edge, or a musty smell all point to a slow leak. Catching those early is the whole game, and if a leak leads to damp, our guide on how to tackle damp and mould in your home explains what to do next.
- Protect the surfaces. Use chopping boards, trivets under hot pans, and wipe up spills promptly. Most worktop damage is slow, avoidable wear.
Treated this way, a well-built kitchen keeps its doors square, its taps quiet, and its worktops sound for well over a decade without a single tradesperson walking through the door.
When to Call a Professional
Most of the repairs in this guide are genuine do-it-yourself jobs. A few are not, and knowing where the line sits saves money and avoids damage.
Call a professional when a job crosses into plumbing, electrics, or structural territory: a tap that leaks from the body rather than the spout, a water supply that will not isolate, a worktop that is swollen through, or a cabinet carcass that has pulled away from the wall. Anything involving the wiring behind an under-cabinet light or the water feed to a dishwasher belongs with someone qualified, both for safety and because Swiss building standards expect the work to be done correctly.
For everything short of that, the right tools and a steady approach go a long way, and a good basic toolkit, a cordless screwdriver, a set of spanners, a sharp blade, and a sealant gun, covers almost every repair in this guide.
If a kitchen job is beyond a quick fix, or you simply want it done quickly and properly the first time, this is exactly the kind of work Home Expert 2 U handles across the Zurich area, from cabinet and worktop repairs to full kitchen refurbishment. Get in touch whenever a small repair starts to feel like a bigger one, and we will take it off your hands.
Frequently asked questions
How often should I reseal the silicone around my kitchen sink?
Inspect the seal once a year and reseal when it goes brittle, discoloured, or starts to lift, which is usually every three to five years in a busy kitchen.
Why has the water pressure dropped at my kitchen tap?
The most common cause is a clogged aerator. Unscrew the small mesh fitting at the tap's tip, soak it in vinegar to dissolve limescale, rinse, and refit it. Pressure usually returns straight away.
Can I fix a loose cabinet door myself or do I need a handyman?
A loose door or a crooked alignment is a quick do-it-yourself job with a screwdriver. Call a professional only if the hinge plate has torn out of the cabinet or the door itself is damaged.
Is a dripping tap worth fixing straight away?
Yes. A tap dripping once per second wastes more than 3,000 gallons a year, and the longer it runs the more likely it is to stain the sink and corrode the fittings.