
How to Draught-Proof Windows and Doors
Key takeaways
- Draught-proofing windows, floors and doors saves a typical home around GBP 55 a year in Great Britain, according to the Energy Saving Trust.
- Most gaps can be sealed with inexpensive foam, brush or wiper strips bought by the metre, with no specialist tools needed.
- A draught-free room feels warmer, so you can often turn the thermostat down a degree and save more without noticing the difference.
- Old, warped or rotten frames that leak badly need professional repair or replacement rather than another strip of foam.
To draught-proof windows and doors, find the gaps where cold air leaks in, then close them with the right seal: foam or wiper strips for window sashes, brush strips for door bottoms, and flexible sealant for fixed frame joints. Most of it is a weekend job with cheap materials and no special skills. Done well, draught-proofing makes rooms feel warmer at once and trims your heating bill through the coldest Zurich months.
This guide walks through every step, from tracking down hidden leaks to knowing when a tired old frame has had its day. We serve homes and businesses across the Zurich area, and draught-proofing is one of the jobs we are asked about most as the weather turns.
Why Draughts Cost You More Than Comfort
A draught is simply uncontrolled air movement: warm air you have paid to heat escaping, and cold outside air sliding in to replace it. The International Energy Agency treats cutting air leakage as one of the most cost-effective ways to improve a building's energy performance, with the gains depending heavily on climate and how leaky the home is to begin with (International Energy Agency).
That variation tells you something useful. A newish, well-sealed flat has less to gain. An older building with single-glazed timber windows and a draughty front door has the most. Zurich has plenty of both, from post-war apartment blocks to charming older houses with original joinery.
Draughts also make a room feel colder than the thermometer says. Moving air carries heat away from your skin, so you crank the thermostat up to compensate. Stop the draught and the same room feels comfortable at a lower setting.
Where Does Cold Air Sneak Into Your Home?
Cold air enters wherever two building parts meet imperfectly: around opening window sashes, along door edges, under thresholds, through letterboxes and keyholes, and at the junction where a frame meets the wall. In most homes, windows and doors are the biggest and easiest wins.
Finding the leaks is half the job. Pick a cold, breezy day, when the pressure difference between inside and outside is greatest, and work methodically around each opening.
Here is a simple checklist to track them down:
- The hand test. Run a slightly damp hand slowly around the edge of a closed window or door. Moving air feels cool on wet skin, even when you cannot feel it dry.
- The candle or incense test. Hold a lit candle or a stick of incense near frame edges. A flickering flame or drifting smoke shows a live draught. Keep it well away from curtains.
- The paper test. Close a window or door on a sheet of paper. If it slides out easily, the seal is not gripping and air will pass too.
- Look for daylight. On a sunny day, a dark room will show thin lines of light around a badly fitting door or sash.
Work through the whole home and mark each leak with a bit of masking tape. You will usually find the worst offenders are an exterior door and one or two older windows.
Common hidden draught spots people miss
Beyond the obvious window and door edges, check a few spots that often get overlooked:
- The gap under skirting boards next to an exterior wall.
- Old, disused keyholes on internal doors to unheated rooms.
- The junction where a window frame meets the plaster, especially in older render.
- Roller-shutter boxes above windows, common in Swiss buildings, which can leak around the slot.
- Cat flaps and old vents that no longer serve a purpose.
A quick way to prioritise: fix the leaks in the rooms you heat and use most first. There is little point sealing a cold cellar window before the living room.
How to Draught-Proof Windows and Doors: Choosing the Right Seal
Match the seal to the gap. Narrow, even gaps around window sashes suit self-adhesive foam or E or P-profile rubber strip. Wider or uneven gaps need a thicker profile or a brush strip. Door bottoms call for a brush or wiper seal, and fixed joints that never move are best filled with flexible sealant.
Buying the wrong product is the most common mistake. Too thin and it does nothing; too thick and the window will not close. Measure the gap with a feeler gauge or a folded strip of card before you buy.
Here is how the main options compare:
- Self-adhesive foam strip. Cheapest and easiest. Good for hinged window sashes with small, even gaps. Sold by the metre. Lasts one to three years before it flattens.
- E, P and D-profile rubber strip. Longer-lasting self-adhesive rubber, shaped to match different gap widths. A solid all-rounder for windows and door frames.
- Metal or sprung strip. Fitted into the frame rather than stuck on. More work to install but durable, and discreet on older timber windows.
- Brush strip. Flexible bristles that suit sliding windows and the underside of doors. Copes well with uneven surfaces.
- Door brush or wiper seal. Screwed or stuck to the bottom of a door to close the gap over the threshold.
- Flexible frame sealant. For the static joint where a frame meets the wall. Fills it permanently without stopping the window from opening.
Draught-proofing strip is inexpensive, often sold by the metre, so the materials for a whole flat usually cost very little. The bigger investment is an hour or two of careful work.
Step by Step: Sealing a Window
Work on one window at a time and start with clean, dry surfaces. Self-adhesive strip will peel away within weeks if you stick it over dust, grease or flaking paint.
Follow these steps for a hinged or casement window:
- Clean the frame. Wipe the contact surfaces with a little detergent, then dry them fully. Cold, damp frames are the main reason seals fail early.
- Measure the gap. Close the window on a strip of card or use a feeler gauge. Note the widest and narrowest points so you buy a profile that copes with both.
- Cut to length. Measure each edge and cut the strip with scissors or a sharp knife. Cut slightly long and trim, rather than short.
- Apply the strip. Peel the backing a little at a time and press the strip firmly onto the frame, not the opening sash, working along each edge. Butt the corners neatly.
- Test the close. Shut the window. It should close with slight, even resistance. If it will not latch, your strip is too thick; switch to a thinner profile.
- Trim and tidy. Trim any overlaps at the corners so the seal sits flat all the way round.
For sliding or sash windows, a brush strip in the running channels works better than foam, which snags. Older sash windows in period Zurich houses often need a specialist sprung-strip system set into the timber, which keeps the window working smoothly while sealing it.
Step by Step: Sealing a Door Frame
Doors leak on all four edges plus the bottom, so treat each separately. The frame edges take the same self-adhesive strip as windows, while the bottom gap and the letterbox need their own fittings.
Work through the door like this:
- Seal the frame edges. Apply foam or rubber strip to the door stop, the part of the frame the door closes against, along the top and both sides. Test that the door still latches.
- Fit a bottom seal. For the gap under the door, choose a brush strip screwed to the face of the door, or a two-part threshold seal for exterior doors that meets Swiss weather head on. A wiper seal suits a smooth, level floor.
- Cover the letterbox. Add a letterbox brush or a sprung flap on the inside. These close draughts without stopping the post.
- Plug the keyhole. A simple escutcheon with a pivoting cover stops the surprising amount of cold that whistles through an old keyhole.
- Address glazed panels. If the door has glass panels, seal around the beading with flexible sealant, the same way you would a window frame joint.
Exterior doors do the hardest work. A heavy entrance door that has dropped on its hinges will never seal well, however much strip you add, because the gap is uneven. In that case the hinge or the frame needs adjusting first. If you are still deciding which jobs to take on yourself, our guide on when to DIY and when to hire a handyman in Zurich is a good place to start.
How Much Can Draught-Proofing Save on Heating Bills?
Draught-proofing your windows, floors and doors saves a typical household around GBP 55 a year in Great Britain, according to the Energy Saving Trust (Energy Saving Trust). That figure is for the UK, where the Trust publishes its data, but the principle carries straight across to Switzerland: seal the leaks and you burn less fuel to hold the same temperature.
The saving comes from two places. First, you stop heating air that immediately escapes outside. Second, a draught-free room feels warmer, so you can lower the thermostat. The Energy Saving Trust notes that turning a thermostat down from 22 to 21 degrees can save around GBP 120 a year in Great Britain. Comfort and savings pull in the same direction here.
Swiss energy prices and heating systems differ from the UK, so treat these numbers as a guide to the scale of the benefit rather than an exact forecast for your flat. The colder and leakier your home, and the longer your heating season, the more you stand to gain. Zurich's long winters tilt the maths in your favour.
Draught-proofing also pairs well with other low-cost winter jobs. Bleeding your radiators so they heat evenly is a natural companion task; our guide on how to bleed radiators before heating season covers it in a few minutes.
Do not seal your home too tightly
There is a limit worth respecting. Homes need some fresh air to stay healthy and to carry moisture away. Seal every last gap without providing ventilation and you risk condensation, damp and mould, especially in kitchens and bathrooms.
Keep these clear at all times:
- Trickle vents built into modern window frames.
- Extractor fans in kitchens and bathrooms.
- Air bricks and wall vents serving rooms with gas appliances or boilers.
The goal is to stop uncontrolled draughts while keeping controlled ventilation. If you have a room that suffers from condensation, improve the airflow before you seal, not after.
What Tools and Materials Do You Need?
Draught-proofing needs very little kit, which is part of its appeal. For most windows and doors you can get the whole job done with a handful of basics from any hardware shop.
Your shopping list looks like this:
- Draught-proofing strip in the right profiles, bought by the metre.
- A brush or wiper seal for door bottoms.
- A letterbox brush and a keyhole cover.
- A tube of flexible sealant and a caulking gun for fixed joints.
- Scissors or a sharp utility knife.
- A tape measure and a cloth with mild detergent.
If you are building up a home kit for jobs like this, our rundown of the essential toolkit every homeowner should own will point you to the few tools worth owning. Nothing on that list is expensive, and all of it earns its keep over a winter.
Buy a little more strip than you measure. Corners, mistakes and the odd miscut mean you will use more than you expect, and a second trip to the shop in the cold is nobody's idea of fun.
Caulking and Sealing Fixed Gaps
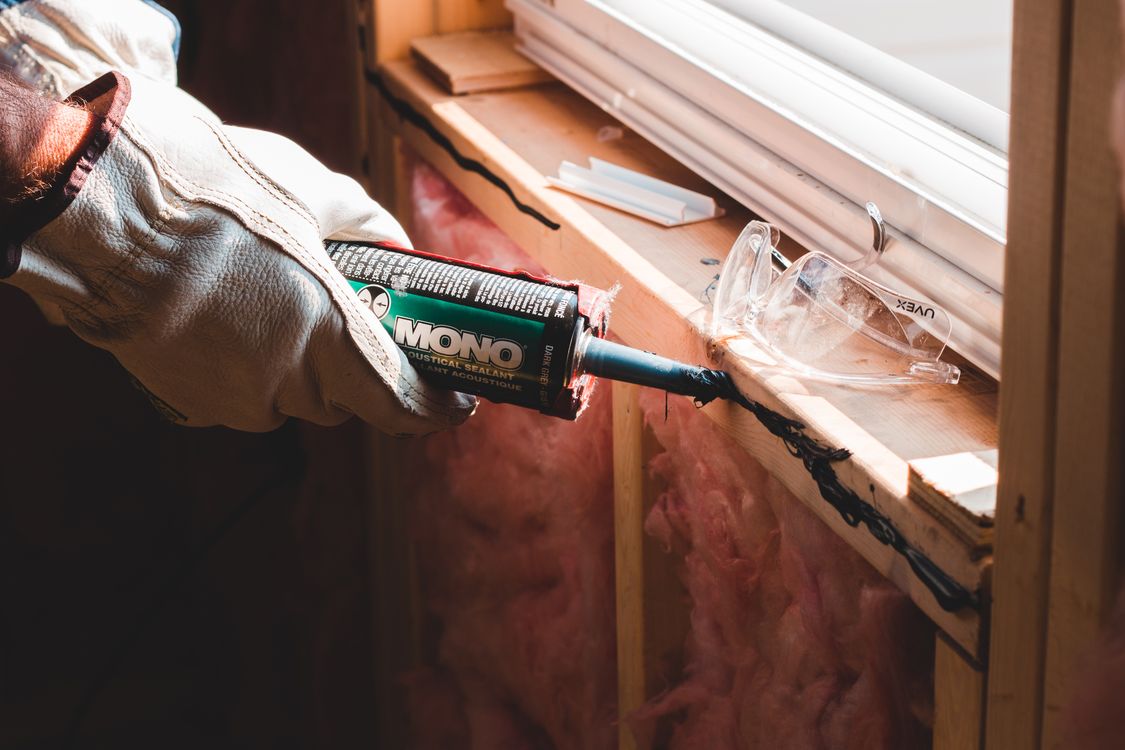
For joints that never move, flexible sealant beats strip every time. The classic example is the line where a window or door frame meets the surrounding wall, where plaster and timber have shrunk apart over the years and left a thin, cold gap.
Apply sealant in a few steps:
- Clean out the gap. Remove old, cracked filler and brush away dust so the new bead can grip.
- Choose the right product. Use a flexible decorator's caulk indoors and a weatherproof sealant outside, where it faces rain and frost.
- Lay a steady bead. Cut the nozzle to match the gap, hold the gun at a constant angle and draw it smoothly along the joint.
- Tool the joint. Smooth the bead with a wet finger or a sealant tool so it beds in and looks tidy.
- Let it cure. Leave it to set fully before painting or exposing it to weather.
Sealant is also the right fix for gaps around pipes and cables passing through exterior walls, which are quiet but persistent sources of cold air. It is one of those small seasonal jobs that pays off quietly all winter.
When Do Old Frames Need Professional Repair?
Draught-proofing strip solves small, even gaps. It cannot rescue a frame that has rotted, warped or dropped out of square, and trying to seal a failing frame only hides the real problem. If a window or door leaks badly no matter what you stick to it, the frame itself likely needs attention.
Watch for these signs that strip is not enough:
- Soft or crumbling timber. Press the frame with a screwdriver. If it sinks in, the wood is rotten and the frame needs repair or replacement.
- Gaps that change size. A door with a wedge-shaped gap that is wide at the top and tight at the bottom has dropped on its hinges or the frame has moved.
- Misting between double glazing. Condensation inside the sealed unit means the seal has failed. No amount of draught strip fixes that; the glazing unit needs replacing.
- Strip that will not hold. If seals keep peeling or the window still rattles, the frame is too uneven for a stuck-on fix.
- Cracked or missing putty on single-glazed windows, letting both air and water in.
This is the point to bring in a professional. Repairing or re-hanging a door, splicing new timber into a rotten frame, or replacing a failed glazing unit are carpentry jobs that need the right tools and a feel for the material. At Homeexpert2u we handle this kind of window and door repair across the Zurich area, along with carpentry and full refurbishments, and we know how local building standards and older Swiss joinery behave. It often works out cheaper to repair a sound old frame than to replace the whole window.
A good rule of thumb: if the frame is structurally sound and only the seal has failed, draught-proofing is your answer. If the timber or the hinges have gone, call in a professional before winter bites.
Keeping Draughts Out Season After Season
Draught-proofing is not quite a fit-and-forget job. Seals wear, adhesive loosens and timber moves with the seasons, so a quick autumn check keeps your home tight year after year. Make it part of your routine before the first cold snap.
Each autumn, run through this short list:
- Re-run the hand or candle test around windows and doors you sealed last year.
- Press along each strip and replace any that is flattened, hardened or peeling.
- Check door brush seals for bent or missing bristles.
- Top up any sealant that has cracked or pulled away from the joint.
- Confirm your trickle vents and extractors are still clear and working.
Ten minutes with a torch and a fresh roll of strip will catch most problems before they cost you a warm, comfortable winter.
Draught-proofing is one of the cheapest, fastest ways to make a home warmer, and most of it is well within reach of a confident DIYer. Start this weekend with the one room you use most, seal its windows and door, and feel the difference that evening. When you hit a frame that is past saving, or you would rather have the whole job done properly before winter sets in, get in touch with Homeexpert2u and we will take care of it.
Frequently asked questions
Is draught-proofing worth the effort in a modern Zurich flat?
Often yes. Even newer flats develop gaps around opening windows and entrance doors as seals age. Sealing them is cheap, quick and makes rooms noticeably warmer in a Swiss winter.
Can draught-proofing cause damp or condensation problems?
It can if you seal a home too tightly without ventilation. Never block trickle vents, extractor fans or air bricks. Keep kitchens and bathrooms ventilated to let moisture escape.
How long does draught-proofing strip last?
Good self-adhesive foam lasts one to three years, while metal or brush seals fitted into the frame can last ten years or more. Check seals each autumn and replace any that are flattened or peeling.
Should I draught-proof or replace my windows?
Start with draught-proofing, since it is far cheaper and often fixes the problem. Replace windows only when frames are rotten, glass is failing, or sealing no longer stops the cold.